通过一番调研,发现国内上市公司科大讯飞的语音+SDK包口碑好,效果好,集成也方便。语音+支持离线应用,这是最主要的。集成过程走起:
1、下载DEMO程序。DEMO程序就包含了全部需要的资源。
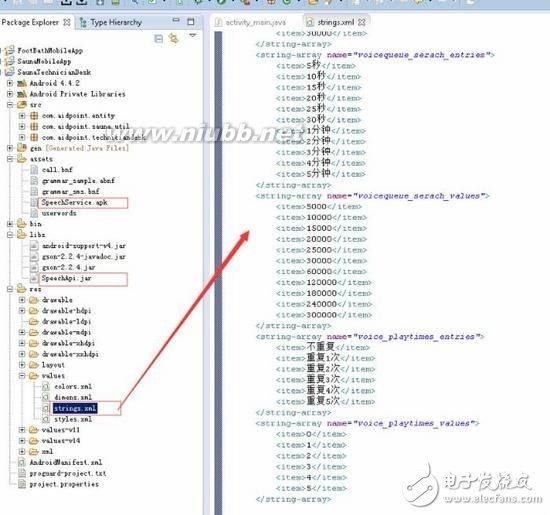
2、SDK集成关键代码:
(1)SpeechSynthesizer 是 jar包里封装的语音合成对象她是我们的女主角。
// 语音合成对象private SpeechSynthesizer mTts;public static String SPEAKER = “speaker”;
从demo照抄实例化mTts的代码。调用方式应该是jar里封装好的方法外包调用,暂时不关注,先关注一下怎样用起来。
private void checkVoiceServiceIsInstalled()
{// 检测语音引擎是否可用,如果没有安装自动安装if (!checkSpeechServiceInstall())
{String assetsApk = “SpeechService.apk”;
if (processInstall(this, assetsApk))SpeechUtility.getUtility(this).setAppid(“53c776aa”);return;}// 引擎初始化
SpeechUtility.getUtility(this).setAppid(“53c776aa”);
mTts = new SpeechSynthesizer(this, mTtsInitListener);}
(2)检查语音加引擎是否安装
/** * 执行本地安装 语音+ * * @param context * @param assetsApk * @return */private boolean processInstall(Context context, String assetsApk)
{try {Thread.sleep(30000);} catch (InterruptedException e) {e.printStackTrace();}// 本地安装方式
if (!ApkInstaller.installFromAssets(context, assetsApk))
{Toast.makeText(activity_main.this, “安装语音引擎失败!”, Toast.LENGTH_SHORT).show();return false;}return true;}/** * 检测科大讯飞语音+引擎是否安装 *
* @return */private boolean checkSpeechServiceInstall() {String packageName = “com.iflytek.speechcloud”;
List
for (int i = 0; i 《 packages.size(); i++) {PackageInfo packageInfo = packages.get(i);
if (packageInfo.packageName.equals(packageName)) {return true;} else {continue;}}return false;}/** * 语音合成的参数设置 *
* @param param * @return */private void setParam() {mTts.setParameter(SpeechConstant.ENGINE_TYPE,sp.getString(“engine_preference”, “local”));
if (sp.getString(“engine_preference”, “local”).equalsIgnoreCase(“local”))
{mTts.setParameter(SpeechSynthesizer.VOICE_NAME,sp.getString(“role_cn_preference”, “xiaoyan”));}
else {mTts.setParameter(SpeechSynthesizer.VOICE_NAME,sp.getString(“role_cn_preference”, “xiaoyan”));}
mTts.setParameter(SpeechSynthesizer.SPEED,sp.getString(“speed_preference”, “50”));
mTts.setParameter(SpeechSynthesizer.PITCH,sp.getString(“pitch_preference”, “50”));
mTts.setParameter(SpeechSynthesizer.VOLUME,sp.getString(“volume_preference”, “50”));}
(3)初期化监听,我在ErrorCode.SUCCESS初始化成功后显示语音引擎可用的状态,否则红叉显示不可以状态。合成回调监听,这里为了避免异步方式调用,听不清楚,使用了局部变量记录当前的语音播报状态isPlaySound。引擎支持异步调用,如果不控制会出现,一句话没说完,其他调用又在发起请求的情况,使用了队列来控制播报的顺序。
/** * 初期化监听。 */
private InitListener mTtsInitListener = new InitListener() {@Overridepublic void onInit(ISpeechModule arg0, int code)
{if (code == ErrorCode.SUCCESS) {btn_voiceDemo.setBackgroundResource(R.drawable.voice_enable_style);}
else {btn_voiceDemo.setBackgroundResource(R.drawable.voice_disable_style);}}};/** * 合成回调监听。
*/private SynthesizerListener mTtsListener = new SynthesizerListener.Stub()
{@Overridepublic void onBufferProgress(int progress) throws RemoteException {}@Overridepublic void onCompleted(int code)
throws RemoteException {activity_main.this.runOnUiThread(new Runnable() {@Overridepublic void run() {int pos = voiceQueueList.indexOf(getCurrentVoiceEntity());
if (pos != -1) {currentVoiceEntity.setVoicePlayNum(currentVoiceEntity.getVoicePlayNum() + 1);
voiceQueueList.remove(pos);
if (currentVoiceEntity.getVoicePlayNum() 》 Integer.parseInt(sp.getString(“voice_play_timers”, “0”))) {currentVoiceEntity.setIsVoicePlayed(true);
new ExecVoiceStatusChangeBiz().execute(String.valueOf(getCurrentVoiceEntity().getKeyId()));}
voiceQueueList.add(currentVoiceEntity);}loadVoiceTaskList();}});isPlaySound = false;}@Overridepublic void onSpeakBegin()
throws RemoteException {isPlaySound = true;}@Overridepublic void onSpeakPaused()
throws RemoteException {}@Overridepublic void onSpeakProgress(int progress)
throws RemoteException {}@Overridepublic void onSpeakResumed()
throws RemoteException {}};/** * 窗体销毁时释放语音服务资源 */
@Overrideprotected void onDestroy() {super.onDestroy();mTts.stopSpeaking(mTtsListener);mTts.destory();}
3、完成。截图纪念一下: